SLIDER

Blueberry Cookie Scone!

Tuesday, June 17, 2014


This could be eaten anytime of the day!!! I was originally making them to take as a snack for work the rest of the week, then I just decided i need to try a big piece with some dark chocolate drizzled on top and call it my dessert! 

They are gluten free, low calorie, sugar free, and low fat! 

You will need:
-blueberries
-1/2 c oat flour
-1 c almond flour
-1 egg
-2 tbs Cornstartch
-1 tsp vanilla
-1/4 c unsweetened almond milk
-1/4 c virgin coconut oil
-1/4 c Splenda baking sugar
-optional: 1/2 square of dark chocolate to drizzle =) 

Start by beating together the coconut oil, egg, and Splenda.


Next, add in your flours, vanilla, and Cornstartch! 


Add your almond milk until a consistency lighter than cookie dough.


Fold in your blueberries....


Place in a pie pan lined with parchment paper.


Bake at 350 for about 30 minutes or until golden brown and just barely soft in the middle! 


Let cool, cut into 6 slices, and serve slightly warm! 


If you want a chocolate drizzle, mix 1/2 piece dark chocolate with 1 tsp coconut oil melted together in microwave! 


Enjoy, and don't get cookie crumbs in the bed! =)


Raw Vegan Chocolate Coffee Cheesecake Bars


This was a HUGE success!!!! Not only is it EXTREEMLY healthy (even with the 12g fat still healthy fats!), but I probably would have a difficult time knowing this is a raw, unprocessed dessert if I tried it with my eyes closed! 

My husband had... Well... 3 of them... In less than 5 minutes =) that means it was good! 

Ingredients:

CRUST
-1 cup dates
-1 cup soaked cashews (I soaked for 3-4 hours)
-1 packet (approx 1-2 tbs) instant coffee
-2 tbs water 

FILLING
-1 cup soaked cashews
-1/4 tbs organic maple syrup (no sugar added)
-1 packet stevia or similar sweetener
-1 tsp vanilla
-3 tbs cocoa
-1/4 c water
-1/4 c organic virgin coconut oil

CHOCOLATE TOPPING
-2 tbs cocoa
-2 tbs coconut oil
-2 tbs maple syrup
-1/4 tsp vanilla


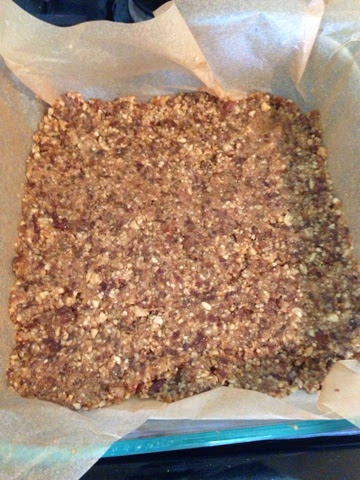
1. Make crust by blending together dates and cashews in processor. Add in coffee and water. If too watery, add a few more dates or cashews. If too thick, add a little more water until has a super thick paste like consistency. 


Keep on blending.. Then press into bottom of 8x8 parchment lined pan.


Place in freezer while you make filling.

In a clean processor, add all ingredients and process....


Keep processing for a while until smooth! 


Have a taste.... Mmmmm. If it needs a little more cocoa, or stevia, or vanilla, add whatever you like here! 

Spread on top of crust....


Now make the chocolate topping.

Melt all three ingredients in a microwave safe bowl ONLY 15 seconds at a time.... Stir... If it needs more melting, only another 10 seconds or so, or you will pass the point of no return and it might congeal. 


Spread randomly in clumps on top of cheesecake layer...


Use a toothpick to make it all swirly and pretty! 

Freeze for a few hours (in my case, 2) and enjoy!!!!! 


Cheesy Spicy Cauliflower Bake!


This was one of the best cauliflower things I've made yet!! Easy, healthy, and hardly any ingredients!! 

Makes about four cups or servings, and each one is about 131 calories! 

-1 head cauliflower
-any spices you like (I used cayenne pepper, red pepper, and garlic)
-3 tbs olive oil
-2 tbs whole wheat flour
-1/2 c almond milk (unsweetened)
-1/2 c lowfat cheese (I used low fat mozz)


Spread chopped cauliflower into baking sheet lined with parchment paper. Heat oven to 400 degrees 


Season with 1 tbs olive oil and your spices . Bake for 30 minutes. 


In saucepan heat your 2 tbs olive oil whisked with the flour until it forms a chunky like paste. Stir in milk and whisk until blended


Add cheese. Whisk some more until thick!


Once cauliflower timer is up, place into a baking dish and drizzle over the cauliflower! Bake for 10 minutes and eat a big ol scoop!! 😏 


Sooooooo cheesy and gooey 


Just a big mouthful of oozing spicy cheese and cauliflower!!

Enjoy! 💜


Southwest Stuffed Bell Peppers!

Sunday, May 18, 2014

Been forever since I've posted!! We bought a home (yay!), and it has been quite the ride waiting for all of our appliances to come in. Therefore, it's been a lot of Whole foods ready meals =). Got our fridge this past week and was finally able to cook in our new home!! 

Anywho, these are easy to make- take about 40 minutes to cook, and can even be made for the next day! 


Stuffed bell peppers are delish! I remember when I was little eating the frozen beef stuffed peppers.... Not healthy.... Packed with sodium... Not to mention I don't eat red meat anymore! 


Ingredients:
-2 red bell peppers, tops cut off and cored
-1 1/2 c ground lean turkey
-1/4 c diced onion
-1/4 c diced green bell pepper
-1/4 c drained no salt added black beans
-1/4 c fresh corn from the cob
-1/2 can low sodium diced tomatoes, drained
-1 green onion stalk
-low fat mexican cheese blend 


1. Sautee onions and peppers for a few minutes, add ground turkey. Cook through

2. Heat oven to 350.

3. Add corn, black beans, and tomatoes 


4. Stuff peppers with mixture


5. Cook for 40 minutes or so! 


Low calorie Crab Rangoons

Monday, March 17, 2014


So I hope I'm not the only female who craves types of foods and has to have them then.... No??? Bueller? Well... I do. Today was Chinese food! So had to make it healthy . Enter. The Crab Rangoon. What is a Rangoon anyway??? I don't know.. I say wonton... Rangoon = wonton. 

This was far easier and much healthier than I would have imagined! Took less than 10 minutes!! 

Makes 12 wontons, serving macros are for 4: 127 calories, 5g carbs, 1g fat, 20g protein!! 

Ingredients:
1 tbs plain nonfat Greek yogurt
2 tbs fat free cream cheese
Dash garlic powder
Dash black pepper
Canned white crab meat (in the tuna isle) 

Start by rinsing and draining your crab meat. Yes, they have crab meat right next to the tuna... Alongside the mussels and oysters, which I don't think id ever be brave enough to try canned oysters ...


Mix all ingredients in a bowl


Lay down wontons and scoop 1 tbs of filling into each one!


Roll up sides carefully not to let the filling ooze out


Cook at 415 degrees for 10 minutes until edges are golden brown... Or you can't wait any longer... Which was my scenario! =) 


Chinese Chicken Wraps

Wednesday, March 12, 2014


Low fat low calorie Chinese chicken lettuce wraps!!! Super yummy, easy, and delicious!! 

Ingredients:
-5 diced chicken breast strips
-2 scallion strands
-butter lettuce, (rinsed, pulled, & dried)
-water chestnuts (drained & diced)
-shiitake mushrooms, diced
-1 tbs hoisin sauce
-1/2 tsp light soy sauce
-ginger & garlic spices


In a sauté pan, add hoisin sauce, soy sauce, and chicken with 1 tbs water. Sauté until chicken is cooked through.


Add the mushrooms and water chestnuts


Sauté until mushrooms are soft 


Using two leaves of whole butter lettuce, add some of the chicken mixture and roll up into a wrap! Enjoy!!! 


Paleo Gluten free Sweet Potato Chocolate Cake

Tuesday, March 4, 2014


This was my first attempt at sweet potato chocolate cake and it turned out GREAT! It was way more moist and cakey than I would have expected! My hubs didn't know it was "special" until after he had eaten it all!! 

You will have to excuse the measurements, as I don't tend to use measuring cups-- so they are approximates/guesstimates. Essentially, you want he end product to be like brownie batter consistency. 


Ingredients:
-1 sweet potato peeled and cooked through (I put in microwave for 8 minutes then in oven at 375 for about 8-10. Peeled it then threw in the processor when it was slightly "mushy." )
-1 c unsweetened cocoa powder
-1/3 c organic light agave or honey
-1/3 c or more (give or take) almond milk
-1 tsp baking powder
-1 tsp baking soda
-2 eggs
-1 tsp vanilla
-1/2 c egg whites

Heat oven to 365.


1. Mix baking soda, baking powder, and cocoa together in large bowl- set aside.


2. Once your potatoes are cooked and skinned (you only want the mushy part- I peeled mine before putting them in the oven and I actually re-peeled them again so that outside texture that hardened wasn't in it), place in food processor with 2 eggs and vanilla.


3. Process until thick and creamy 

4. Slowly mix into dry ingredients. 

5. In lightly greased cake pan (I used coconut oil), pour batter.

6. Cook through until toothpick comes clean from center.


7. Cool on rack for hour or more. I placed mine in fridge for another 20 minutes just to be sure. 

*hint: if you ice it even slightly warm, the icing will melt and droop*

For icing:

1. Whip egg whites until stiff peak forms.

2. Meanwhile, heat in saucepan another 1/4 c of honey until slightly boiling. 

3. Once peaks are almost set lightly drizzle in The hot honey. 

4. Optional: stir in cocoa nibs, almonds, raspberry preserves, etc. I did not-- but next time I want to use preserves! 


Ice the cake with icing spatula (works much easier if you have one!) 


Enjoy!!! Light and low in calories! 


Blog Design by Nudge Media Design | Powered by Blogger